
How to use Custom Made Boards in the light housing
December 13 2021 – Mike Corso

With our custom made boards, you can put some light on your rear bumper reflector housing.

This time, we are going to use the Subaru Impreza rear bumper reflector. housings.

You can cut open the housing with any methods. We cut opened this housing from side.

We cut opened the housing.

We decided to use the 4P (4 LED) version Custom Made Boards.
These boards can be separated into each pieces.

Place the boards roughly on the inside.

Looks like some of the edges need to be cut just little bit.

Sanded - You can sand only limited area.
Please check the circuit line on the PCB.

Now looks like it fits well.

Now we need to connect the each board with soldering work.

Soldering completed. And let's talk about how to solder how to connect the power to the each board.

These red spots are bigger soldering spots,
these deliver the POWER, also it makes the entire boards strong and secure.

And these yellow spots are for enable the power to the bigger red spots.
Why these yellow spots exist? We will explain bit later.

We soldered these red and yellow spots.
As you see, many of them are soldered together, red and yellow.
However, some of them only has red spots soldered but yellow spots.
Red bigger spots are soldered for rigid strong board structures and power,
Yellow smaller spots enable the power thru the Red bigger spots.
The custom made boards we used are dual color version (Red / Amber),
This time, we wanted to use only red.
All the Red '-' and all '+' need to be wired.
This board, Color B is red. (There are 2x '-' channels, Color A- and B-)
 Please see this picture, as you can see, all Color B- and all + are connected.
Now how to mount these boards to into the housings?
You can attach some iron wires on the unused bigger soldering spots.
Of course this time, no need any power so only bigger spots need to be used.

Looks like it fits well.

Time to mount these custom made boards.

With hot soldering tip, you need to melt these iron wires on to the plastic side.

They hold the entire board really well.
Also, we wired the power wires.

Now it's time to re-assemble everything.

We used hot soldering tip to melt the cover and base housing together.

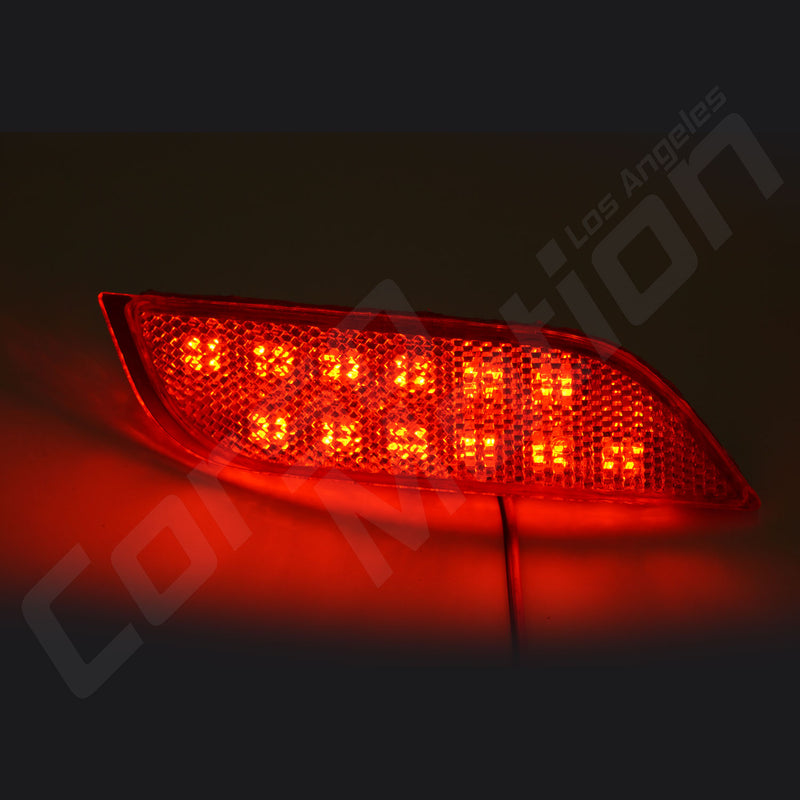
With power off, it looks like from the outside.
Custom work done with the CorsoMotion LEDs.
In this post, we used 4P custom made boards.
Please contact us if you have any questions.
Thank you very much.
0 comments